The Complete Guide to Spring Cleaning Your Kitchen

The kitchen is frequently described as the heart of every home, and it’s often where fond memories are made with family and friends. Unfortunately, this busy room is also the one which has the most potential to get dirty from daily cooking and food storage.
If left to fester, dirty surfaces, old food, and grimy appliances will harbor bacteria that can increase the risk of illness. Therefore, keeping your kitchen clean will not only make it more inviting to use, but it’ll also help to keep you and your family healthy.
In our complete guide to spring cleaning your kitchen, we bring you our top tips for cleaning the most commonly used areas so that you can enjoy a sparkling clean and healthy kitchen in no time.
The Freezer
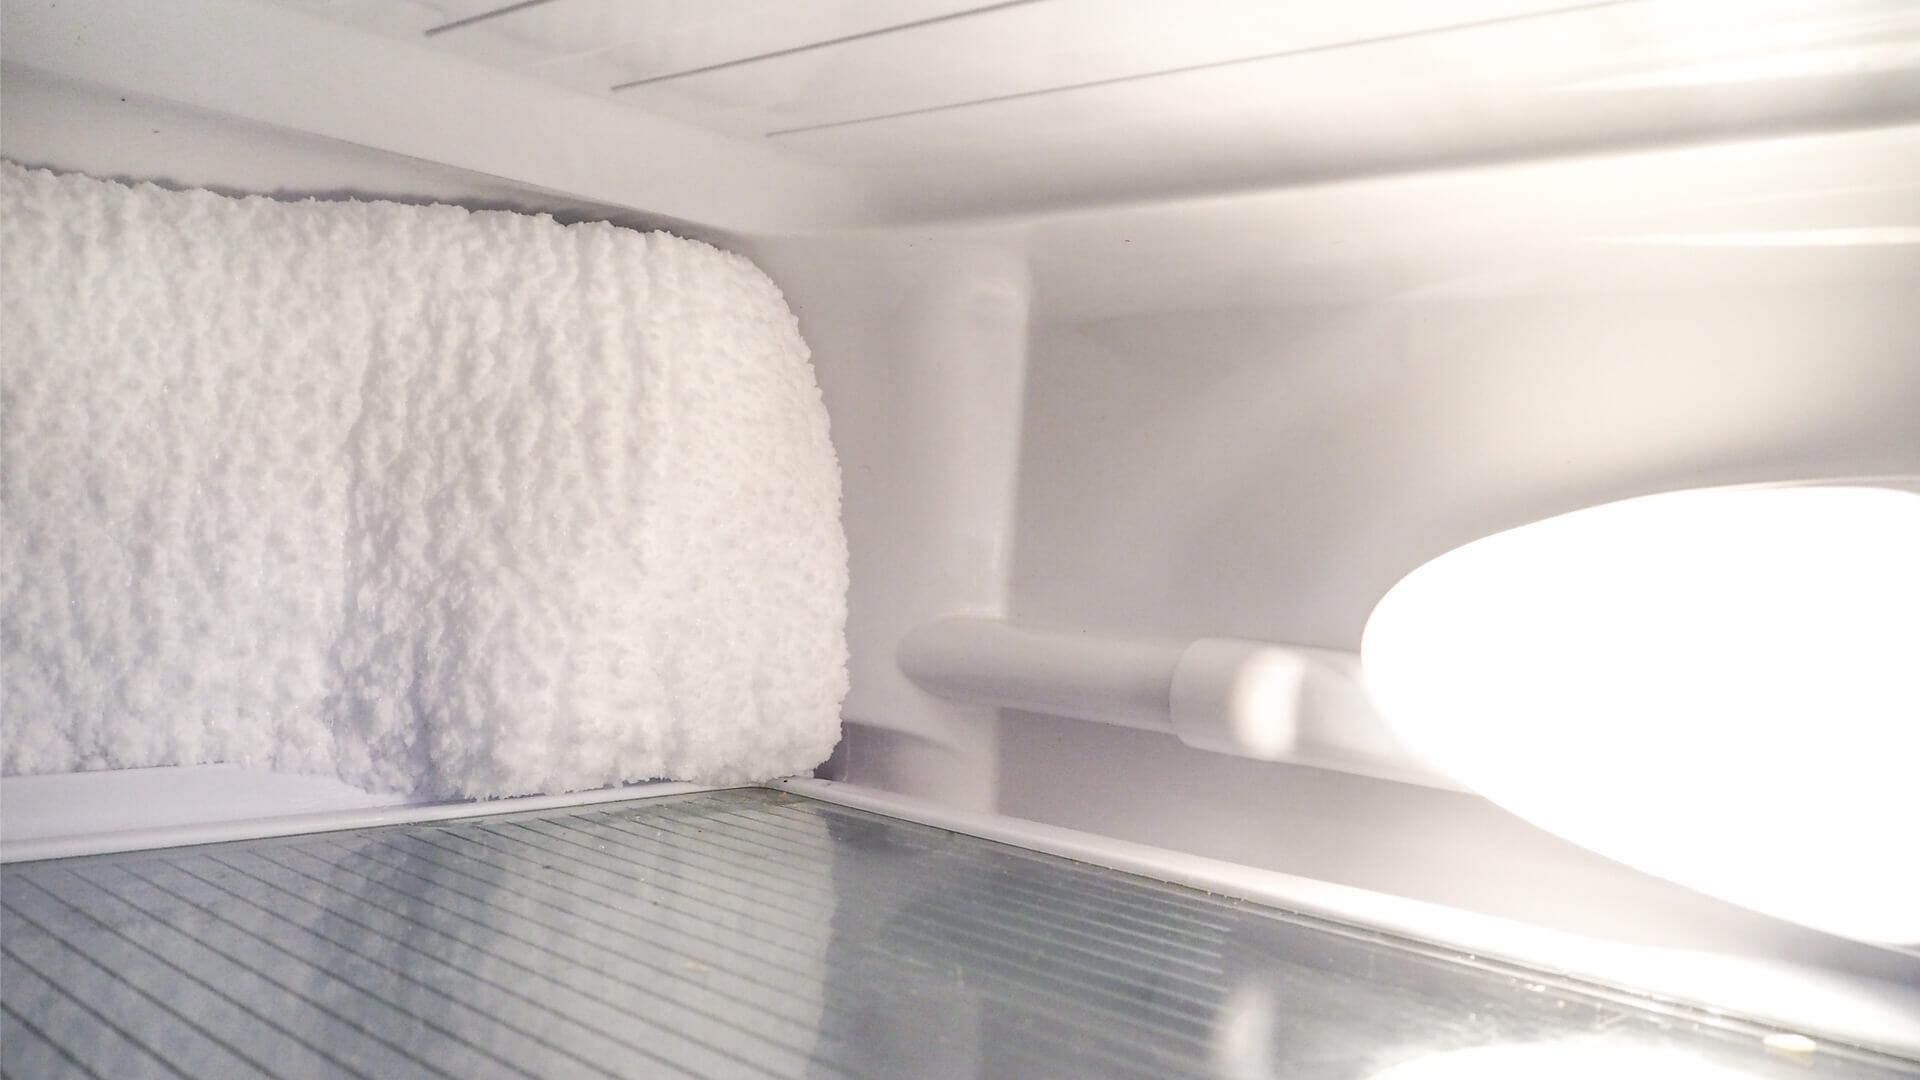
Defrosting the freezer is a vital part of any kitchen maintenance routine. Since we stock freezers full of food and produce we want to enjoy for longer, these essential kitchen appliances need to be maintained in order to do their job optimally.
The general rule is that a build up of a quarter of an inch of ice on the interior walls is enough to warrant attention. Without regular defrosting, your appliance may cease to work effectively.
Defrosting your freezer does not necessarily have to be a long and arduous process. Doing this regularly is a great opportunity to discard any out of date items. It will also remind you of what groceries you have and what you need to purchase.
Follow these simple steps to defrost your freezer quickly and efficiently:
- Use up any food that has been frozen for a while in advance of defrosting.
- Use up any food that has been frozen for a while in advance of defrosting.
- Unplug the freezer and keep the doors open to allow warm air to melt the ice.
- If there are any removable shelves or compartments, take them out and put them in the sink. You can also use this opportunity to give them a thorough clean.
- Place some towels and trays around and under your freezer to collect the melted water.
- You can allow the melting process to happen naturally or you can speed it up by placing a bowl of boiling water in the freezer and closing the door. Alternative methods involve using a scraper or a hot cloth for the same accelerating effect.
- Once all the ice has melted, give the interior a good clean with an effective antibacterial cleaner. Distilled vinegar or any food friendly kitchen cleaner will do the trick.
- Plug your freezer back in and restore your food.
Defrosting your freezer can seem like a difficult and time-consuming task, but it will save you time and money over time since it will keep your freezer working well for longer.
The Fridge
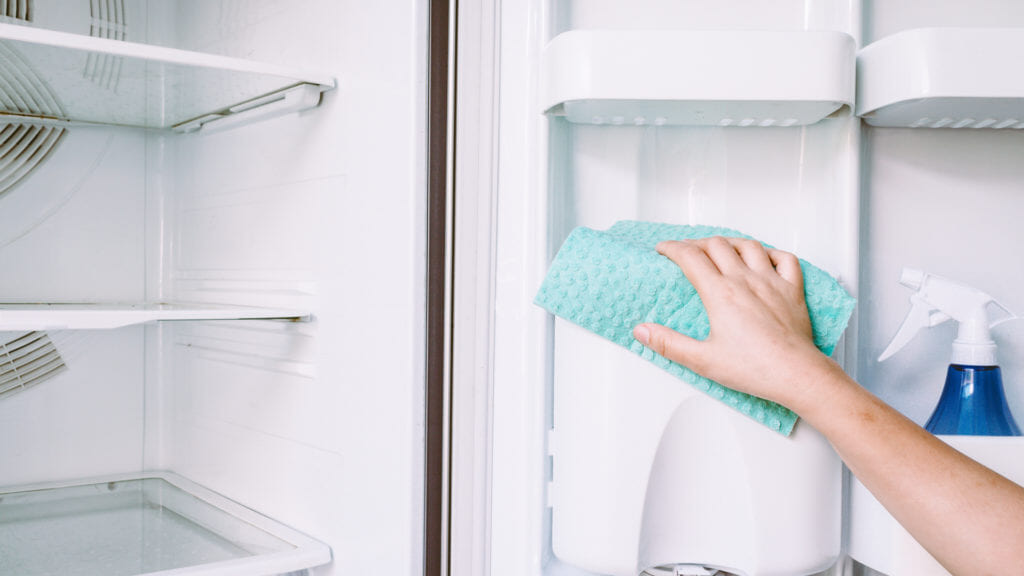
The fridge is probably the largest electrical appliance in the kitchen and is continually in use, so it is important to clean it regularly to keep it working to its best ability. Cleaning your fridge regularly will also maintain its suitability for storing your food. It is advised that it is done at least every 3-6 months if possible. The best time to do this is before you do a large food shop, since you will need to store food outside the fridge while you clean.
Follow these simple steps to spring clean your fridge.
- Empty the fridge, storing any perishable items appropriately in cooler bags or in cool places around your home. Dark and shaded places are usually best. It is a great time to go through what you have and compost or throw out anything past its expiration date.
- Take out the shelves from the fridge and salad crisper drawers from the bottom. Wash them in washing up soap and hot water.
- Wash and wipe the interior of the fridge thoroughly with cooler water so you dont substantially raise the temperature of the fridge You can make use of toothpicks or cotton buds to remove any stubborn food or dirt in hard to clean areas.
- Dry your fridge interior with a clean kitchen towel, shut the door, and let the temperature cool down before restoring your food.
The Oven
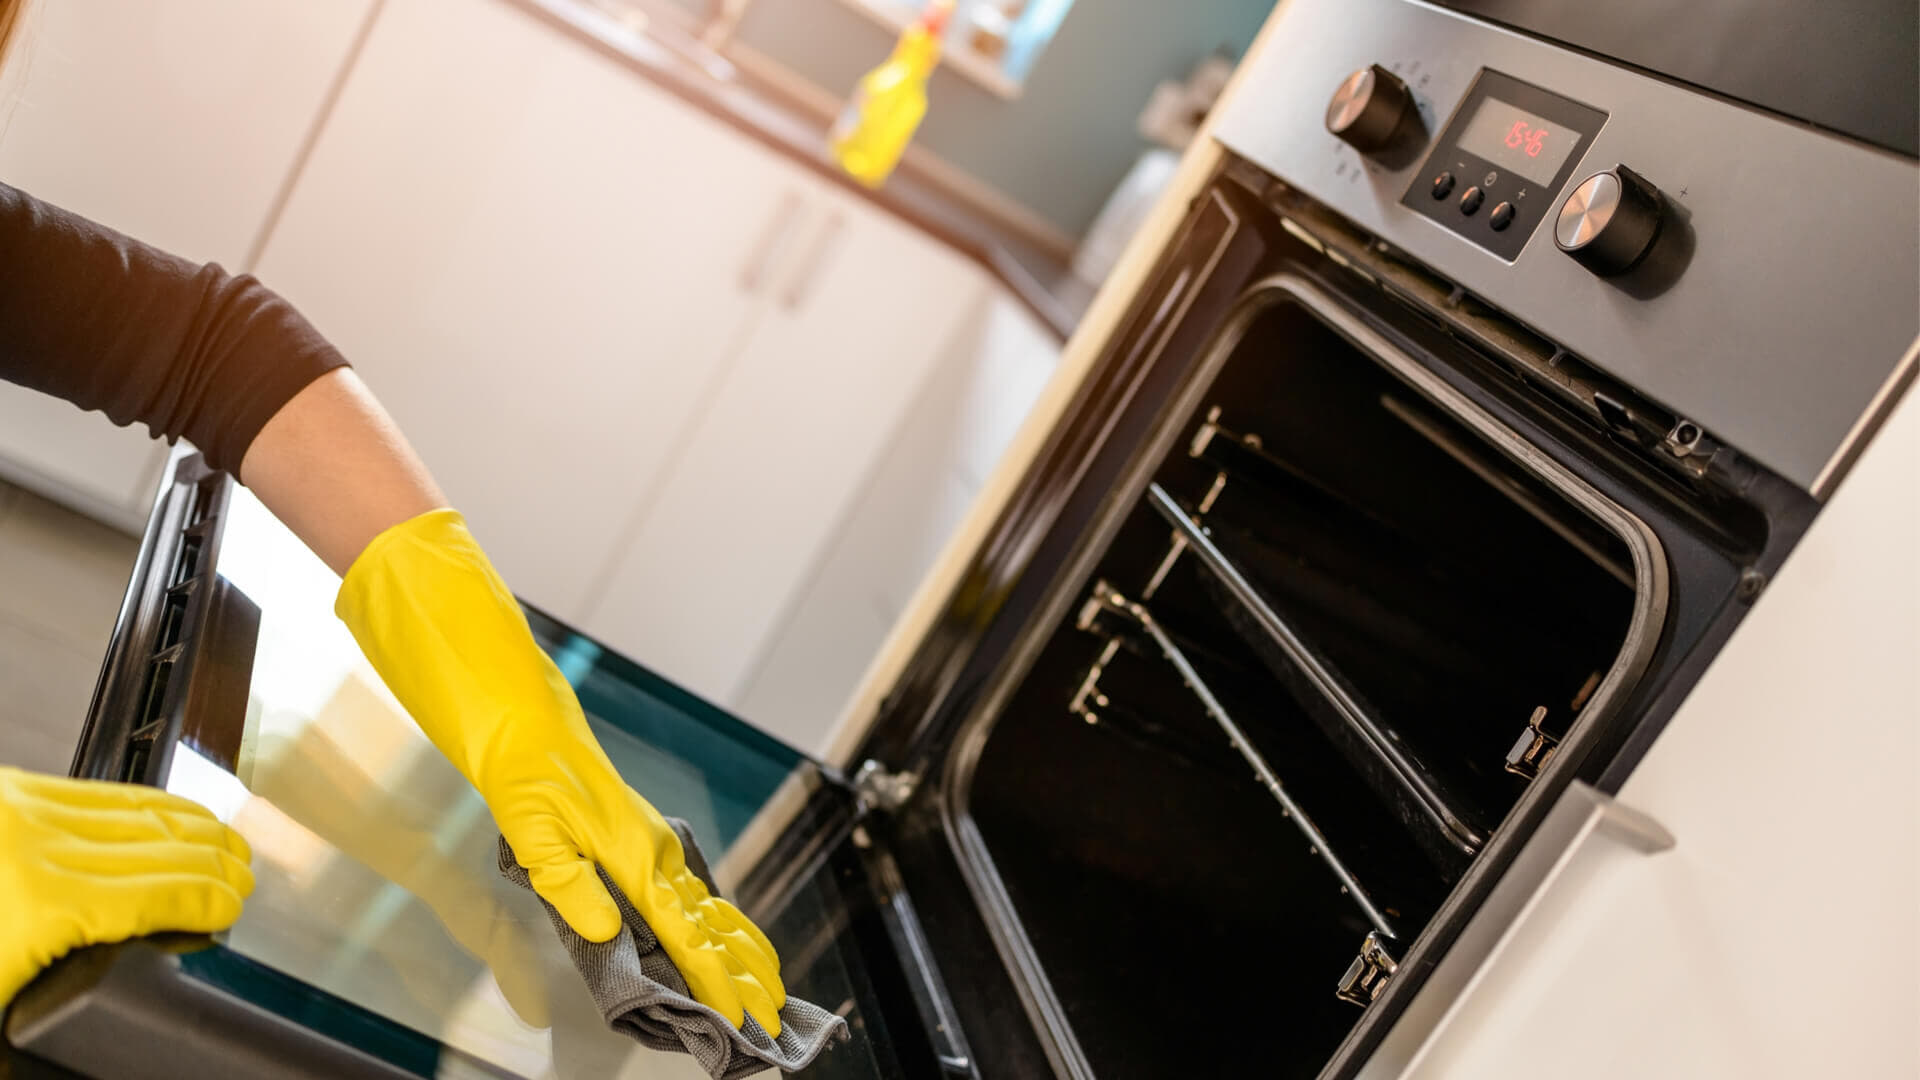
How frequently your oven needs cleaning will depend on your cooking and baking habits, as well as the type of oven you have. But, surprisingly, cleaning your oven may make you a better cook. This is because the little burnt bits of food can absorb heat and make your oven less efficient.
Follow the steps below to spruce up your oven:
- Use an oven specific cleaner to clean the inside of the oven. Take precautions: wear rubber gloves and make sure the kitchen is well ventilated.
- Wash your oven shelves in the sink your or dishwasher. Scrub off any stubborn grease.
- Next you can tackle the door. A shiny and clean oven door means you can easily take sneak peaks at the cooking progress of your meal. Using a spatula, scrape off any burnt food. If the glass is removable, a soak in some biological cleaner will work wonders to get it sparkling again. If not, a paste made from bicarbonate soda will work just as well.
- Once you’re done, help keep your oven clean by using roasting bags and oven liners to prevent spillages and build up of grease and food.
The Microwave

The microwave has become an essential heating appliance in most kitchens and must be regularly maintained and cleaned. Since the microwave is usually used daily, it can quickly build up germs around the handle. Moldy residue on the inside of the microwave can also cause sickness and strange-tasting results.
For a deep microwave clean, using lemons is an easy method.
Follow our steps below to get your microwave sparkling clean:
- Cut a lemon in half
- Squeeze into a microwaveable bowl and toss in the rind too
- Add a cup of water
- Switch on the microwave for approximately 2.5 minutes
- Leave it to rest for 15 minutes.
- Open and wipe down thoroughly
The lemon steam will not only break down any grease and grime for easy wiping, but also bring a fresh citrus aroma to your kitchen.
The Kitchen Cabinets

Cabinet doors easily become splattered while cooking. Cabinet handles can also become greasy from frequent usage. Once grime and grit has built up on these doors, it can be difficult to restore them to their former glory. To keep things manageable, regularly wiping them down on the inside and the outside will give them keep their shine for longer.
The Exterior:
For regular cleaning, most cabinets can be easily cleaned with dish soap and a cloth. Simply wipe them down with soapy water, removing any grease or residue. Follow up with a dry cloth to absorb any remaining water on the cabinets as water can seep into the material and damage them.
For a deeper clean, you may have to resort to chemical cleaners or a simple mix of bicarbonate soda with orange oil. Orange oil is a great natural option that is known to effectively break down grease.
The Interior
Wiping down the interior of the cabinets is just as essential. It will help manage any mould and deter any unwanted critters.
- Empty your cabinets, starting higher up
- Vacuum up any crumbs or residue
- Wash or wipe down the shelves with gentle cleaning detergent
- Wipe down the contents before replacing
- To keep your cabinet shelves clean, consider using cabinet liner before placing the contents back in their places
The Pantry

The pantry is possibly the most overlooked part of the kitchen, but it is crucial to keep it clean and organized. This is because if you don’t know what you have or where it is, things can become out of date before you can use them. You can also end up buying things you don’t need since you forget what you already have. Follow these steps to spring clean and organize your pantry:
- Go through your pantry and toss out any items past their expiration date. Some of these items may be good for composting, so check for this to help reduce food waste.
- If you have items that you haven’t used for a while but are still within the expiration date, it may be a good idea to donate them since they might not be essential for your everyday cooking.
- Empty the shelves to remove any dirt. Getting rid of food residue is important so you don’t attract insects. Also check for mold and make sure any signs of this are treated appropriately.
- Make sure the food in your pantry is sealed in bags and containers to reduce changes of spillage.
- Organize your pantry so things are easy to find. One way to accomplish this is to group items by type: store canned vegetables together, grains together, and so on. This way you can easily replace things if your stock runs low.
Kitchen Countertop

It is crucial that you clean your kitchen countertop regularly and thoroughly. It’s the space you use the most in the kitchen to prepare your food, and germs and bacteria can easily transfer from surfaces to dishes that you are preparing.
Granite:
For granite countertops, gentle dish soap, antibacterial spray and microfiber cloths will do the trick. Contrary to popular belief, Windex is not something you should use since it can damage your countertop. You also want to use as few chemicals as possible as this is where you prepare food.
Marble:
Marble is a beautiful material, but it stains easily. Some spray with water and mild dish soap should easily spruce it up and keep it clean. Stay away from lemon and vinegar since these can damage the surface due to their acidic nature.
Kitchen Sink

Whether it is because of soap and food deposits, rust, or general grime and dirt, your kitchen sink needs a regular clean.
- Empty your sink of dishes and remove any deposits from the drain.
- Get a bowl of hot water and dish soap, and with a gentle sponge scrub down the sink.
- Use lemon or bicarbonate soda for more stubborn stains.
- If you have a build up of lime on your faucet, use vinegar. Limescale is the white spots that appear on silver due to the hard water. A great trick is to use paper towels soaked in vinegar on the affected areas and leave them for ten minutes. You then buff them with dry towels. The results will be worth it.
Final Thoughts
Few people enjoy cleaning. But as this guide has shown, if you break the task down into easily manageable steps, spring cleaning your kitchen shouldn’t feel like an insurmountable challenge. Take your time and work through each area bit by bit. If you like, you can focus on appliances one day, and countertops and cabinets on the next. Before you know it, you’ll have a beautiful, sparkling clean kitchen which you’re proud to show off to family and friends.

